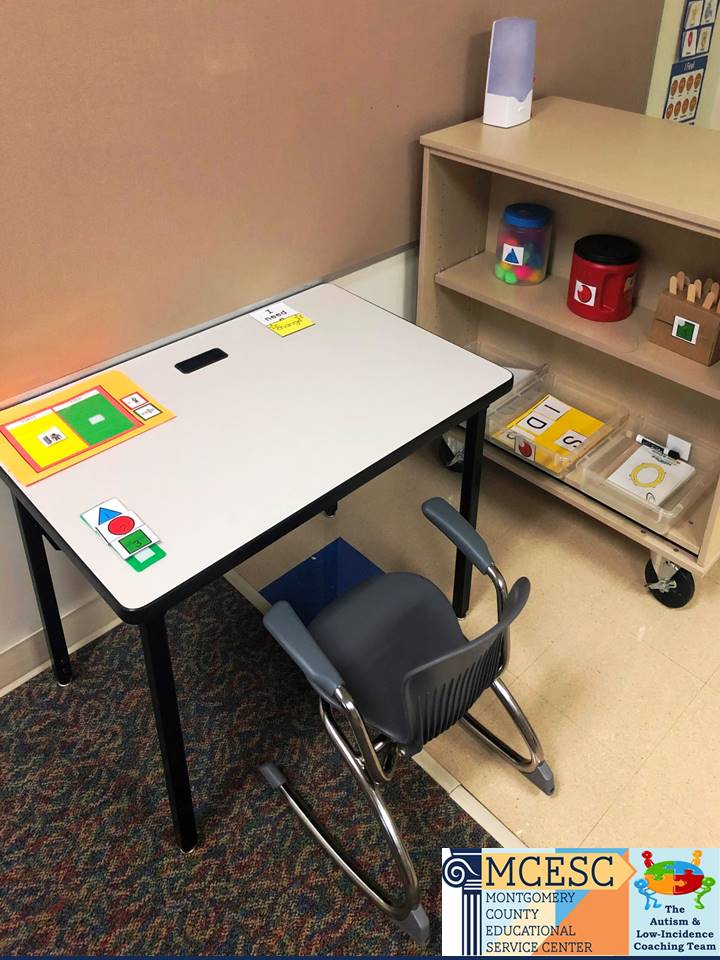
Location-based visual schedules are an excellent support for students who struggle with physically transitioning between activities throughout the school day. When using a location-based visual schedule, students take the icon off their schedule and match it to a corresponding location label within the classroom or school environment. Today's Super Star Schedules will walk you step by step through implementing this effective support.

Step 1- Make a list: Identify locations the student will transition to throughout the day.
- Locations should include various places throughout the classroom (carpet, desk, table, cubbies, etc.) and the school building (cafeteria, bathroom, music room, etc).
Step 2- Create and hang location signs: Create pictures to represent each
of the locations on the list. Designate the location by hanging the sign or
placing in a free standing frame. Use velcro to provide a space for student’s
to affix their schedule cards.
- The schedule pictures can consist of line drawings, photographs, shape symbols, or color cards depending on what is the most accessible for your students.
 |

 |
| Symbolstix Location Signs Sandy McIntosh Trotwood ELC, Trotwood-Madison |

 |
| Activity-based Location Sign Rylie Jarrett Stevenson Elementary, Mad River |

 |
| Location Sign Rylie Jarrett Stevenson Elementary, Mad River |
 |
| Color-based Location Sign Molly Magoteaux Kleptz ELC, Northmont |
Step 3- Create schedule cards and schedules: Create schedule cards that
correspond with the location signs. Create an individual schedule for the
student that consists of a long rectangle card with a strip of Velcro. Sequence
small Velcro pictures on Velcro strip in order of student’s school day. Determine a stationary area of the classroom
where the student’s schedule can be kept.
- Using a laminated file folder for individual schedules allows flexibility of storing extra pictures on the inside or folding/flipping the schedule to reveal certain times of day.
- Some students have difficulty visually scanning too many pictures. It may be necessary to divide the day into to parts (i.e. morning schedule, afternoon schedule)
 |
| Student Schedules Sandy McIntosh Trotwood ELC, Trotwood |
 |
| Student Schedule Rylie Jarrett Stevenson Elementary, Mad River |
Step 4- Teach the schedule: Students will need to be directly taught to
transition when staff says “check schedule” by traveling to their stationary
schedule location, taking off the top card, and traveling to location to match
to matching picture.
- Also, directly
teach what to do when they get to that location (i.e. sit at own desk, sit on
carpet, choose computer, line up, etc.). After the
student transitions to a location within his schedule, a mini schedule or
visual work contract may be used to break up the tasks within that location
(i.e. morning unpacking schedule, afternoon pack up schedule, independent work
sequence, etc.).
 |
| Shape-based Location Sign with Matching Icons Sandy McIntosh Trotwood ELC, Trotwood-Madison |
Step 5- Signal each transition: At the end of the activity, cue the end of
the current activity using auditory (timer, bell, or chime and verbal cue to
“check schedule”) and or a visual cue (visual countdown, “check schedule” card)
to prompt the student to return to their schedule and see what comes next.
- Transition signals (visual, auditory, and/or verbal) should be used consistently across environments and staff members.
- If a student struggles with transitioning to the designated schedule location, a favorite picture card to match to their schedule can be an additional tactile cue.
 |
| Student Schedule with Mickey Mouse Visual Cue Sanday McIntosh Trotwood ELC, Trotwood-Madison |